Chocolate Canele Recipe

Before indulging in the decadent world of Chocolate Canelés, consider experiencing the timeless elegance of the original recipe. The traditional Canele, with its delicate vanilla and rum flavors, offers a culinary journey rooted in history. We recommend trying the classic version first, embracing the subtle nuances of the authentic Bordeaux treat.

However, for those seeking a richer, more indulgent experience, Chocolate Canelés beckon with their luscious cocoa-infused custard center. Paired with the crisp exterior characteristic of canelés, this recipe promises a symphony of flavors that will delight any chocolate aficionado.

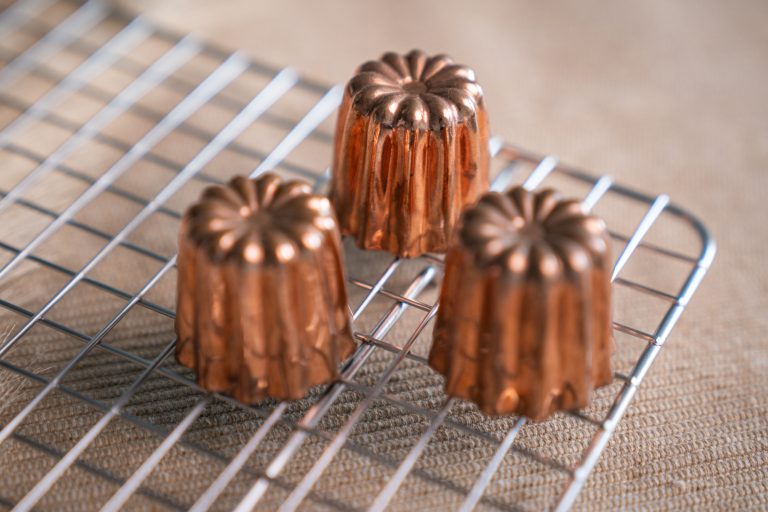
When embarking on your chocolatey adventure, consider the size of your molds. Opting for medium or large copper molds ensures a perfect balance between the caramelized crust and the tender core, allowing the flavors to harmonize beautifully. Now, let’s dive into creating these irresistible Chocolate Canelés.

Ingredients

500g of whole milk (or even raw milk)
65g of semi-salted butter
65g of amber rum
210g of chocolate
210g of sugar
170g whole egg
2 large egg yolks
100g of flour

Preparation of the Chocolate Caneles

  1. Begin by pouring the milk into a saucepan along with the rum, chocolate, and semi-salted butter. Heat the mixture over low heat, ensuring it doesn’t boil, just long enough to melt the butter and chocolate.
  2.  
  3. While the milk mixture is heating, place the 170g of whole egg and the 2 egg yolks in a bowl along with the sugar. Mix gently with a whisk until just combined. Add the flour to the egg mixture and stir until smooth.
  4.  
  5. Slowly pour the heated milk mixture into the bowl with the eggs and flour, stirring constantly to combine all the ingredients thoroughly.
  6.  
  7. Transfer the combined mixture into a container. Allow it to cool to room temperature, then cover it with cling film and refrigerate overnight. This resting period helps develop the flavors and textures.
  8.  
  9. The next day, remove the container from the refrigerator at least 3 hours before making the canelés. Give the mixture one final gentle mix. Grease the copper molds with butter or use a non-stick baking spray to ensure easy release of the canelés.
  10.  
  11. Preheat your oven to 275°C. If your oven’s maximum temperature is 250°C, ensure it reaches at least that temperature.
  12.  
  13. Once the oven is fully preheated, bake the canelés for 10 minutes at 275°C or 13 minutes at 250°C. Then, lower the oven temperature to 180°C and continue baking for an additional 35 minutes.

Pro Tips For Succesful Chocolate Caneles

  1. Chocolate Selection: Choose high-quality chocolate with a cocoa content that suits your taste preferences. Dark chocolate will provide a more intense flavor, while milk chocolate offers a sweeter profile. Experiment with different varieties to find your perfect balance.
  2. Temperature Control: Ensure that the milk mixture is heated gently over low heat to melt the chocolate and butter without boiling. This prevents the chocolate from burning and ensures a smooth, velvety texture in your canelés.
  3. Egg Incorporation: When mixing the eggs and sugar, avoid overmixing to prevent incorporating too much air into the batter. This helps maintain the dense, custard-like texture of the canelés.
  4. Resting Period: Don’t rush the resting period in the refrigerator. Allowing the batter to chill overnight allows the flavors to meld and the texture to develop, resulting in richer and more complex canelés.
  5. Mold Preparation: Properly grease the copper molds with butter or use a non-stick baking spray to ensure easy release of the canelés after baking. This step is crucial for achieving perfectly shaped canelés with intact crusts.
  6. Oven Preheating: Make sure your oven is fully preheated to the specified temperature before baking the canelés. This ensures even heat distribution and helps create the signature crispy exterior of the canelés.
  7. Baking Time and Temperature: Follow the recommended baking times and temperatures closely for optimal results. The initial high heat helps create a caramelized crust, while lowering the temperature allows the canelés to bake evenly without burning.
  8. Cooling Process: Allow the canelés to cool in the molds for a few minutes after baking to maintain their structure. Then, transfer them to a wire rack to cool completely. This helps prevent condensation and preserves the crispiness of the exterior.
share